Eti Electronic Vav 2b5kt
This document was ed by and they confirmed that they have the permission to share it. If you are author or own the copyright of this book, please report to us by using this report form. Report r6l17
Overview 4q3b3c
& View Eti Electronic Vav as PDF for free.
More details 26j3b
- Words: 11,995
- Pages: 36
BY JOHNSON CONTROLS Installation, Operation & Maintenance
SERIES 7000 ANALOG ELECTRONIC CONTROLS New Release
Form ET130.13-NOM5 (209)
FORM ET130.13-NOM5 (209)
TABLE OF CONTENTS TABLE OF CONTENTS.................................................................................................................................2 safety symbols.......................................................................................................................................3 1.0 - DEFINITIONS AND DESCRIPTIONS....................................................................................................4 1.1 - Thermostat . ...................................................................................................................................4 1.2 - Controller and Modules ................................................................................................................5 1.3 - M9104 Series Floating Point Actuator .........................................................................................6 2.0 - installation.....................................................................................................................................7 2.1 - Inspection ......................................................................................................................................7 2.2 - Coordination of Trades..................................................................................................................7 2.3 - Thermostat Mounting ...................................................................................................................7 2.4 - Wiring Installation .........................................................................................................................9 2.5 - Controller Wiring ...........................................................................................................................9 2.6 - Thermostat Wiring ........................................................................................................................9 2.7 - Actuator Installation and Removal (Service Only) .....................................................................9 2.8 - Module Installation and Removal...............................................................................................10 3.0 - COMMISSIONING AND BALANCING................................................................................................. 11 3.1 - Commissioning Procedure ........................................................................................................11 3.2 - Air Balancing Procedures ..........................................................................................................11 3.3 - Most Terminal Units ....................................................................................................................12 3.4 - Constant Primary Volume ..........................................................................................................13 3.5 - Dual Duct .....................................................................................................................................14 4.0 - TROUBLESHOOTING........................................................................................................................16 4.1 - DAMPER MOTION .......................................................................................................................17 4.2 - FAN ...............................................................................................................................................18 4.3 - ELECTRIC OR HOT WATER HEAT .............................................................................................19 4.4 - NIGHT SETBACK..........................................................................................................................21 4.5 - NIGHT MODE, COMMON PROBLEMS........................................................................................22 4.6 - MORNING WARM-UP / CHANGEOVER.......................................................................................23 4.7 - AUXILIARY MINIMUM...................................................................................................................24 4.8 - AIRFLOW READINGS...................................................................................................................25 4.9 - NO RESPONSE FROM THERMOSTAT........................................................................................26 4.10 - CORRECTIVE ACTIONS.............................................................................................................27 5.0 - TEMPERATURE CALIBRATION ........................................................................................................28 5.1 - THERMOSTAT ..............................................................................................................................28 5.2 - D UCT (SUPPLY AIR) TEMPERATURE SENSOR .......................................................................28 6.0 - part numbers & sequence number cross reference .................................................29 6.1 - THERMOSTAT PART NUMBERS ................................................................................................29 6.2 - 700 TO 7000 SEQUENCE NUMBER CROSS REFERENCE ......................................................29 6.3 - 700 TO 7000 CONTROLLER MODEL NUMBER CROSS REFERENCE . ..................................31 AIRFLOW CALIBRATION CURVES............................................................................................................32
2
Johnson Controls
FORM ET130.13-NOM5 (209)
safety symbols The following symbols are used in this document to alert the reader to areas of potential hazard: DANGER indicates an imminently hazardous situation which, if not avoided, will result in death or serious injury.
CAUTION identifies a hazard which could lead to damage to the machine, damage to other equipment and/or environmental pollution. Usually an instruction will be given, together with a brief explanation.
WARNING indicates a potentially hazardous situation which, if not avoided, could result in death or serious injury.
NOTE is used to highlight additional information which may be helpful to you.
Johnson Controls
3
FORM ET130.13-NOM5 (209)
1.0 - DEFINITIONS AND DESCRIPTIONS This manual applies to Series 7000 Modular Analog Electronic Controls. It does not apply to earlier 700 Series controls. A manual for that series is available from the ENVIRO-TEC® website at www.enviro-tec. com under the title “700 Series Analog Electronic Controls, Operation & Balancing Manual” (Stock I.D. IOM-700).
The 700 Series thermostats should not be used with Series 7000 controls. However, Series 7000 thermostat may be used with 700 Series controls. You may require both manuals. Specific part numbers and their relation to application numbers may be found in Section 6.0.
1.1 - Thermostat (Fig. 1) a. Thermistor. Glass-encapsulated, hermetically sealed temperature sensing device mounted on front of the thermostat printed circuit board. b. Setpoint Control. Hidden version shown. Also available with exposed dial in English or metric scale (see Fig. 6).
c. Enclosure. Protects thermostat and provides stable temperature environment for sensing. To remove cover, push firmly on one side (not top or bottom) of cover, and pull other side away from base. d. Connectors. Protected terminal block on back of thermostat base. Terminal designations are engraved on back of base. e. Thermostat Packaging. Bubble pack design for protection during shipment. Terminal numbers, signal designations, serial number, inventory number and CO number are shown on outside of package, as well as min, max, and fan CFM on set CFM projects. f. Minimum Flow Adjustment. White potentiometer on printed circuit board (see Fig. 1). CW rotation increases minimum CFM. g. Maximum Flow Adjustment. White potentiometer on printed circuit board (see Fig. 1). CW rotation increases maximum CFM. h. Auxiliary (Heating) Minimum Adjustment. White potentiometer allowing increased flow when heat is energized. CW rotation increases heating CFM. Should always be turned fully clockwise if heating minimum feature is not used. i. Temperature Calibration. Factory set. Adjustment rarely required.
LD13964
FIG. 1 - THERMOSTAT 4
Johnson Controls
FORM ET130.13-NOM5 (209)
a
a
b
FIG. 2A - MASTER CONTROLLER
1.2 - Controller and Modules a. Thermostat Connectors. One-piece, captive screw terminal type for reliable connections. b. 24 VAC and Control Output Connectors. Male, ½", quick connect type. c. Labels. Computer printed with serial number, inventory number and CO number. 1.2.1 - Master Controller (Fig. 2a)
e
c
d
LD13963
1.2.2 - Heat/Fan Modules (Fig. 2b)
Series of modules incorporating a variety of fan and heat control applications including series or parallel fan control and/or staged, floating or proportional heat control. This series can be identified by red color of circuit board. 24 VAC Fan and Heat Outputs
Thermostat Sensor and Valve Actuator Inputs/Outputs
Incorporates flow transducer, damper control and power supply for modules. Sockets on modules slide onto pins on master controller. A screw inserted through the solder side of the master controller screws into threads of a module’s mounting bracket. a. Flow Transducer. Device mounted on controller which produces electronic signal proportional to flow. Fittings for this device are connected to the inlet of the VAV terminal at the factory with tubing. b. A.C. Actuator Drive. When replacing a 700 Series DC drive controller, an M9104 Series actuator must be installed. c. Desired Flow (VSP) Test Loop d. Actual Flow (VF) Test Loop (located underneath flow transducer) e. Common (Com) Test Loop. Mounting Bracket Master Controller Mating Sockets
Deadband Adjustment (Optional) LD13969
FIG. 2B - HEAT/FAN MODULE Johnson Controls
5
FORM ET130.13-NOM5 (209)
1.2.3 - Setback/Warmup Modules (Fig. 2c)
Series of modules incorporating night setback and/or morning warmup. Depending on model, warmup may be accomplished through cooling/heating (summer/ winter) changeover, or setting damper to maximum airflow setpoint. This series can be identified by green color of circuit board. Thermostat and Sensor Inputs/Outputs
1.3 - M9104 SERIES FLOATING POINT Actuator (Fig. 3) Direct-coupled, AC drive actuator. Incorporates current limit circuitry that removes power from motor when a mechanical stop is met. See Installation Instructions (Part No. 34-636-1433) at www.enviro-tec.com.
Supply Air Changeover Temperature Adjustment
Night Setback Offset Adjustment
Mounting Bracket Master Controller Mating Sockets
LD13972 LD13973
FIG. 2C - SETBACK/WARMUP MODULE
FIG. 3 - M9104 SERIES FLOATING POINT ACTUATOR
1.2.4 - Flow Control Modules (Fig. 2d)
Series of modules incorporating a variety of applications including dual duct, constant primary air volume, air volume tracking, or building management system anaterface. This series can be identified by blue color of circuit board, labeled DD/CV/TB/BMS on early models. Thermostat, Closure or Voltage Inputs / Outputs
Maximum Airflow Adjustment
Auxiliary Minimum Airflow Adjustment Minimum Airflow Adjustment
Master Controller Mating Socket
Mounting Bracket
LD13968
FIG. 2D - FLOW CONTROL MODULE 6
Johnson Controls
FORM ET130.13-NOM5 (209)
2.0 - installation SIDE VIEW
FRONT VIEW
MODULAR CONTROLLER FLOWSTARTM, CENTER AVERAGING AIRFLOW SENSOR WITH EXTERNAL BALANCING TAPS
LD13957
FIG. 4 - TYPICAL COMPONENT MOUNTING
2.1 - Inspection (Fig. 4) Upon receipt of VAV terminals, check controls for shipping damage such as loose or broken connectors, loose actuator or broken controller circuit board, loose or disconnected tubing and loose wiring. Also inspect both before and after installation for damage caused by abuse or mishandling. A diagram of a typical control component mounting configuration is provided (see Fig. 4). 2.2 - Coordination of Trades Contractor should see that all trades involved with both the VAV terminals and the electronic controls (including thermostats) have a copy of the documentation and submitted control sequence data prior to installation.
2.3 - Thermostat Mounting Thermostats are shipped inside the control enclosure or shipped separately from the Terminal units. The thermostat may be mounted directly to drywall or, optionally, to a horizontally mounted, single gang junction box. 2.3.1 - Drywall Mounting (Fig. 5)
a. Decide where to mount the thermostat and drill a 1-3/8" hole for the wire mounting block, on the back of the thermostat, to fit into the wall. b. Remove the thermostat cover by pushing firmly on one side (not top or bottom) of cover, and pulling other side away from base.
WALL ANCHOR TEMPERATURE CALIBRATION MINIMUM AIRFLOW AUX (HEATING MINIMUM)
SETPOINT POTENTIOMETER
MAXIMUM AIRFLOW
FRONT COVER CONCEALED SETPOINT
INSULATING WASHER MOUNTING SCREW (2) 6-20 X 1” SHEET METAL LD13965
FIG. 5 - DRYWALL MOUNTING AND DRYWALL POTENTIOMETERS Johnson Controls
7
FORM ET130.13-NOM5 (209)
c. Hold the thermostat on the wall with the mounting block in the hole drilled in “step a”. Mark the location of the two mounting holes to either side of the center hole. DO NOT drill the mounting holes with the thermostat on the wall; use the thermostat only to locate the holes. d. Remove the thermostat and drill two 3/16" mounting holes. Insert the wall anchors into the mounting holes e. Connect the wires to the appropriate terminals according to the application submittal data. Be sure to connect the jumper wire from terminal #3 to #1 for all sequences except those incorporating a duct temperature sensor. f. Position the thermostat on the wall. Fasten the thermostat with the two 6-20x1" sheet metal screws, and insulating washers provided. g. (Optional) For exposed setpoint thermostats, turn the setpoint potentiometer to the desired temperature and place the setpoint knob onto the setpoint potentiometer with the desired temperature marking at the top of the dial. h. Snap the cover back in place with the ENVIROTEC® logo at the bottom of the thermostat.
2.3.2 - Junction Box Mounting (Fig. 6)
a. The junction box cover provided can be used either horizontally or vertically by simply breaking out the appropriate tab. To mount horizontally break out tab "B", to mount vertically breakout tab "A". b. Attach the 2 inch thermostat to the junction box cover with the two 6-32X1/2" round head screws, nuts, washers, and insulating washers provided. c. Connect the wires to the appropriate terminals according to the application submittal data. Be sure to connect the jumper wire from terminal #3 to #1 for all sequences except those incorporating a duct temperature sensor. d. Mount the cover to the junction box using the two 6-32X1/2" counter sunk screws provided. e. (Optional) For exposed setpoint thermostats, turn the setpoint potentiometer to the desired temperature and place the setpoint knob onto the setpoint potentiometer with the desired temperature marking at the top of the dial. f. Snap the cover back in place with the ENVIROTEC® logo at the bottom of the thermostat.
6-32 NUT (2) WASHER (2)
INSULATING WASHER MOUNTING SCREW (2) 6-32 X 1/2” ROUND HEAD SETPOINT KNOB (OPTIONAL)
JUNCTION BOX (SHOWN HORIZONTAL)
JUNCTION BOX COVER
MOUNTING SCREW (2) 6-32 X 1/2” COUNTER SUNK HEAD
BALANCE POST GROUND LOOP
FRONT COVER EXPOSED SETPOINT (OPTIONAL)
LD13970
FIG. 6 - SINGLE GANG JUNCTION BOX SHOWN WITH EXPOSED SETPOINT 8
Johnson Controls
FORM ET130.13-NOM5 (209)
2.4 - Wiring Installation
Disconnect all power supplies to the system before wiring to avoid damage to the equipment or possible electrical shock. a. Required Wire Type for external control connections – 18 to 20 AWG stranded, copper. b. Wiring Diagrams – Refer to ENVIRO-TEC® Submittal Data in submittal package and/or on cover of control enclosure to determine correct terminals for wiring. Prior to wiring, insure that the submittal sequence matches the control model number. (Refer to parts list in section 6). Obtain control sequence wiring diagram from your local ENVIRO-TEC® sales representative. c. To reduce the possibility of electrical interference, control wiring to thermostat and optional remote closures should not be routed close to A.C. power (line voltage) wiring, electrical machinery or lighting. 2.5 - Controller Wiring a. Thermostat and Control Input Connections: 1. Using a small screwdriver, turn screw fully CCW. 2. Insert stripped wire(s); 18-20 AWG stranded copper (see Fig. 7).
3. Turn screw fully CW. Make sure connector clamps uninsulated portion of wire. Do not overtighten. b. 24 VAC Input and Control Output Connections:
1. Strip 1/4" of insulation from 18-20 AWG stranded copper wire. 2. Attach a 1/4" quick connect spade type receptacle to the uninsulated portion of the wire using a set of crimpers. 3. Push receptacle over spade and printed circuit board. Fit is tight. Wiggling off or pulling off with pliers may damage board. If removal of a connector is required, pry off with screwdriver, ing PC board with your fingers.
2.6 - Thermostat Wiring a. If thermostat has already been mounted to wall, remove it. Terminal numbers are engraved on back of thermostat above and below two row, six position barrier terminal block. b. Strip 1/4" insulation from wire. c. Insert wire under terminal retainer. Make sure retainer clamps bare wire, not insulation. d. Repeat steps b. and c. for all wires shown on submittal diagram. If diagram shows a wire from controller connected to terminal three, remove factory installed jumper wire. Otherwise, attach bare end of factory installer jumper to terminal 1. 2.7 - Actuator Installation and Removal (Service Only) See M9104 Series Installation Instructions at www. enviro-tec.com (Part No. 34-636-1433).
1/4 “ STRIP
LD13966
FIG. 7 - SCREW TERMINAL CONNECTOR
Johnson Controls
9
FORM ET130.13-NOM5 (209)
2.8 - Module Installation and Removal This procedure should only be required if a feature is being added to the control, or in the rare case of a damaged or defective module. a. Remove power from the controls. If a disconnect is not supplied with the terminal and it is not practical to disconnect at breaker, this may be accomplished by removing the end of the fuse next to terminal 16A of the master controller with a non-conductive tool. If module removal is not required, proceed to step f. b. Disconnect any wiring from the module to be removed.
If the power was removed by pulling one end of the fuse, these wires could still be hot. Do not allow them to touch the control enclosure, control bracket, controls or each other. c. If the back of the control bracket is positioned against the side of the control enclosure, remove the two sheet metal screws holding the control bracket to the control enclosure. Pull the bracket away from the side of the enclosure. d. Remove the screw securing the module to the Master Controller by inserting a Phillips screw driver through the appropriate hole provided in the back of the control bracket. e. Remove the module by pulling straight back from Master Controller. f. Remove the screw from the bracket in the new module. Save it as it will be used later in the procedure.
10
g. Locate the correct position on the Master Controller for the module being installed. These positions are labeled on the Master Controller with both the module series name and the color of the module circuit board. h. Slide the socket(s) of the new module onto the pins provided on the master controller. Make sure all the pins line up with the socket. j. Insert the screw provided with the module through the appropriate hole in the back of the control bracket, and through the master controller into the threaded bracket riveted to the module. Tighten the screw so the module is pulled down onto the Master Controller circuit board.
If the screw does not want to “start”, the most likely cause is that the Master Controller pins are not correctly aligned with the module socket(s). Remove the module and reinstall. Under no circumstances should the module be installed without the screw as this action could lead to future service problems. k. Wire the module per the appropriate application submittal data and the techniques and recommendations in Sections 2.4 and 2.5.
Always that wiring is correct before applying power.
Johnson Controls
FORM ET130.13-NOM5 (209)
3.0 - COMMISSIONING AND BALLANCING Required Items
a. Tools required: 1/8" flat blade screwdriver. b. Digital voltmeter capable of reading to the hundredths place and capable of reading 30 Volts AC/DC. Low impedance meters will not work correctly. c. Airflow Calibration Curves (see Fig. 11). Optional Items
a. Test Clips for voltmeter (optional): Test Clips (see Fig. 8) are not absolutely necessary but are very helpful. They may be obtained from a local consumer electronics store. b. Magnahelic gauge incline manometer or other differential pressure measuring device. c. Flow hood.
FIG. 8 - TEST CLIP
LD13967
3.1 - Commissioning Procedure
Lethal voltages are present on the primary windings.
Always that wiring is correct before applying power.
The following items must be checked before beginning the air balancing procedure. a. Inspect all electrical connections to assure proper fit and location, in accordance with the proper wiring diagram. that transformer leads carry a high voltage on the primary windings and associated terminals. LETHAL VOLTAGES MAY BE PRESENT. Johnson Controls
b. Check primary voltage to the control voltage transformer (if applicable). Use caution, as the primary power connections to the transformer are lethal. Check output voltage from the transformer. This should be between 22 and 28 VAC. If outside these limits immediately remove power and determine the reason for improper power. (See Troubleshooting, Section 4.0.) c. Check that there is primary airflow (or static pressure if the damper is closed) in the inlet duct. d. The unit should be checked for proper sequence response using the Application Submittal Data before attempting to balance system. 3.2 - Air Balancing Procedures
These procedures apply to the 2" square low profile thermostat. If an older model thermostat is installed, refer to the “700 Series Analog Electronic Controls Operation & Balancing Manual” (Stock ID IOM-700). Most described adjustments are made at the thermostat. Additional adjustments may be required at the terminal unit itself with some applications. Remove the thermostat cover by pushing firmly on one side (not top or bottom) of cover, and pulling other side away from base. In most cases, flow adjustments are located on the thermostat printed circuit board (see Fig. 1). NOTE: Do not adjust the uppermost potentiometer. This is used for temperature calibration, which is rarely required. The procedures described below use voltage-flow setpoints for setting airflow rates for each size unit. The curves provided in this manual (see Fig.’s 11, 12, 13) allow setting of maximum and minimum volume to design air limits (Optional). The pressure signal from the inlet sensors can be used to flows and assist in the system balance. Connect a magnahelic, inclined manometer or other differential pressure measuring device to the balancing tees provided (see Fig. 4). The high pressure signal is delivered from the tube connected at the “bottom” of the probe, and the low pressure signal is delivered from the “top” of the probe. The pressure differential between high and low represents the sensed velocity pressure amplified in the inlet duct. (The manometer should have a full scale reading of 0"– 2.0" in W.G.) 11
FORM ET130.13-NOM5 (209)
Section 3.3 should be followed for all applications except single duct (SDR) constant primary air volume (Section 3.4) and dual duct (DDR) applications (Section 3.5). NOTES:
1. Room temperature must be between 65 and 85°F. 2. Minimum airflow must always be set first. 3. For optimum control accuracy on units with inlet sizes of 6" or greater, a straight section of duct at least 1.5 duct diameters long and the same diameter as the inlet collar should be installed upstream of the terminal inlet. For units with 4" or 5" inlet, use 3 to 5 duct diameters. 4. For 2" thermostats with ET numbers before March 1, 1997, connect the black lead (-) to the left side of D2, above the balance post and to the right of the setpoint potentiometer. 3.3 - Most Terminal Units Some sequences have balancing adjustments on the flow control module. If balancing one of these sequences, connect voltmeter to “VSP” and “COM” test loops on master controller instead of balancing post and common loop on the thermostat. If application incorporates warmup or changeover, unit is in cooling mode by measuring voltage between terminals 3 (+) and 2 (-) of thermostat. If less than 14 VDC, temporarily remove duct sensor wire from terminal 3 of controller. 3.3.1 - ALL TERMINAL UNITS
Steps 3.3.1 and 3.3.6 should be followed for all applications, while steps 3.3.2 through 3.3.5 are only used for the particular application listed in each step. a. Remove cover as described in Section 3.2 and setpoint knob (if applicable) from thermostat. Use Airflow Calibration Curves (see Fig.’s 11 and 13) to determine VSP voltages required for the desired minimum and maximum airflow settings. For SDR, VFR and CFR terminals, use graph in Fig. 11. For SSD, VVF and CVF terminals, use the graph in Fig. 13. For instance, if a minimum CFM value of 200 is desired for a 6" SDR box, the corresponding VSP voltage is 9.2VDC. b. To read VSP, connect the red lead (+) from a DC voltmeter to the post at terminal #5 under the setpoint potentiometer (shown in Fig. 6). Connect the black lead (-) to the common loop (shown in Fig. 6) above and to the right of the balance post. For single duct applications with dual minimums, remove the wire connected to terminal #4 of the heat/fan module. 12
c. Turn setpoint potentiometer to full heating. the small white potentiometer labeled "AUX" is turned fully clockwise. Adjust small white potentiometer labeled "MIN" for the desired minimum CFM voltage for VSP. If "AUX" is not turned fully clockwise, this step will not work correctly. d. Turn the setpoint potentiometer to full cooling. Adjust the small white potentiometer labeled "MAX" for the desired maximum CFM voltage for VSP. 3.3.2 - Warm Up/Changeover
If sequence wiring diagram does not show a wire from terminal #3 on the thermostat to terminal #2 on the controller (ETPCO module), proceed to Step B. a. If the thermostat has been wired to the controller, the factory supplied jumper from terminal #1 to #3 should already be removed and terminal #3 on the thermostat should be connected to terminal #2 on the controller. This may be a good time to remove the thermostat and that the jumper has been removed. If the jumper is still on the back of the thermostat remove it and the wiring to the sequence. b. Adjust the blue potentiometer on the setback/ warmup module labeled "Duct Sensor" to a temperature midway between the expected cold and warm air temperatures. Recommended minimum difference in cold and warm air temperature is 10°F.
If you turn the Duct Sensor potentiometer fully CCW, the sensor is set to switch at 50°F. If you turn the Duct Sensor potentiometer fully CW, the sensor is set to switch at 90°F (e.g., if it is desired for the controller to operate in the daytime mode for duct temperatures less than 75°F, and operate in the morning warm-up mode for duct temperatures more than 75°F, the Duct Sensor potentiometer located on the controller should be adjusted just past the halfway point towards the "90" mark). Johnson Controls
FORM ET130.13-NOM5 (209)
3.3.3 - Dual Minimum (Single Duct Applications Incorporating a Heat/Fan Module)
a. Reconnect the wire on terminal #4 (removed in step 3.3.1.b). b. Connect a DC voltmeter (as described in step #3.3.1.b). c. Refer to the Airflow Calibration curves again to determine the required voltage for the desired heating minimum CFM setting. d. Turn the temperature setpoint potentiometer to full heating. Adjust the small white potentiometer labeled "AUX" until the voltmeter reads the desired voltage. 3.3.4 - All Series Flow Fan Terminals (Models CFR, CFRQ)
a. These terminals need the fan speed adjusted so that when drawing maximum primary airflow, no air is either entering or leaving the plenum air inlet. Turn temperature setpoint to full cooling, and wait for damper to move to maximum CFM setpoint. b. A motor speed adjustment terminal strip and an electronic fan speed controller are used to make this adjustment. Locate these components in the terminal's control or electric heat enclosure. A hole in the front cover of the fan speed controller allows adjustment using a small screwdriver. the adjustment if fully CW.
Lethal Voltages are Present! • Disconnect all power before attempting to adjust motor speed using the motor speed adjustment terminal strip. • Do not adjust the fan speed controller using the hand! • Do not touch the back of the fan speed controller! • Do not adjust the second, factory set potentiometer – only accessible from the back – or warranty will be voided.
d. Remove power. Remove end of jumper connected to "Low Spd" terminal and reinstall on the "Med Spd" terminal. e. Re-apply power. If air is leaving the plenum air inlet, go to step 3.3.4.f. Otherwise, go to step 3.3.4.g. f. Remove power. Remove end of jumper connected to "Med Spd" terminal and reinstall on "High Spd" terminal. Re-apply power. g. Using the hole in the front cover of the fan speed controller and a small screwdriver, slowly adjust CCW until no air is either entering or leaving the plenum air inlet. 3.3.5 - N ight Setback (Fan Powered Applications Incorporating a Setback/Warmup Module and a Pressure Switch)
The temperature setting for night set back is located on the setback/warmup module. The controller is factory set at a maximum of 15 degrees below setpoint, (offset adjustment turned fully clockwise). (i.e. if the thermostat setpoint is 74 degrees the heat will energize at 59 degrees during night set back). Turn the adjustment fully counter clockwise for a 0 degree offset, or halfway for a 7.5 degree offset. 3.3.6 - All Terminal Units with Thermostats
a. When all the applicable balance procedures from above are completed, turn the setpoint potentiometer to the desired temperature. Place the (optional) setpoint knob onto the setpoint potentiometer with the desired temperature marking at the top of the dial. b. Snap the cover back in place with the ENVIROTEC® logo at the bottom of the thermostat. 3.4 - Constant Primary Volume 3.4.1 - Applications Incorporating a Heat/Fan Module
a. that small white potentiometer labeled "AUX" is turned fully clockwise. If it is not turned fully clockwise this step will not work correctly. b. Turn the "MAX" potentiometer fully counter clockwise.
c. If air is leaving the plenum air inlet, go to step 3.3.4.d. Otherwise, go to step 3.3.4.g. Johnson Controls
13
FORM ET130.13-NOM5 (209)
c. Use the Airflow Calibration Curves (see Fig’.s 11 and 13) to determine the VSP voltage required for the desired constant airflow setting. Determine the proper curve to use as described in step 3.3.1.a. d. To read VSP, connect a DC volt meter (as described in step 3.3.1.b). e. Adjust the small white potentiometer labeled "MIN" for the desired voltage for VSP that corresponds to the desired airflow. f. Go to 3.3.6. 3.4.2 - A pplications incorporating a Flow Control Module
a. Constant primary volume applications not requiring a thermostat have the air flow adjustments on the Flow Control module. Disregard all statements that refer to the air flow adjustments on the thermostat when dealing with these applications. The flow curves at the end of the manual are still used for setting CFM. b. Connect the red (+) lead from the DC voltmeter to the “VSP” test loop and the black (-) lead to the “COM” test loop on the master controller. If the application requires two constant primary volume settings controlled by a closure, open the . Turn the adjustment labeled “AUX” on the Flow Control module to the voltage corresponding to the required constant primary air volume. c. If the application requires two constant primary volume settings controlled by a closure, close the . Turn the adjustment labeled “MIN” on the Flow Control module to the voltage corresponding to the required constant primary air volume. 3.5 - Dual Duct Dual Duct applications have the air flow adjustments on the Flow Control module. Disregard all statements that refer to the air flow adjustments on the thermostat when dealing with Dual Duct applications. The flow curves at the end of the manual are still used for setting CFM. If flow readings are being set/verified with a hood, a deck can be isolated by temporarily disconnecting the "COM" wire from the actuator of the other deck, and using the manual override to close the damper.
14
3.5.1 - DD7100
a. Connect the red (+) lead from the DC voltmeter to the "VSP" test loop and the black (-) lead to the "COM" test loop on the hot deck master controller. Turn the adjustment labeled "AUX" on the hot deck ETPCV2 module to the voltage corresponding to the desired total air flow for constant volume applications, or the desired maximum heating air flow for variable volume applications. b. Turn the temperature setpoint knob to full cooling. Connect the red (+) lead from the DC voltmeter to the "VSP" test loop and the black (-) lead to the "COM" test loop on the cold deck master controller. Turn the adjustment labeled "MAX" on the cold deck ETPUC module fully counter clockwise. Set the adjustment labeled "MIN" on the cold deck ETPUC module to the desired minimum cold deck airflow. c. Set the adjustment labeled "MAX" on the cold deck ETPUC module to the desired maximum cold deck airflow. For constant volume applications, if a zero heating minimum is desired, this setting will be the same as the desired total airflow set in step "a". If a heating minimum is desired, the maximum cold deck air flow setting should be less in CFM (greater in voltage) than the desired total airflow setting by the value of the desired heating minimum. 3.5.2 - DD7200
a. Turn the temperature setpoint knob to full heat. Connect the red (+) lead from the DC voltmeter to the "VSP" test loop and the black (-) lead to the "COM" test loop on the hot deck master controller. Turn the adjustment labeled "MAX" on the hot deck ETPUH module fully counter clockwise. Turn the adjustment labeled "MIN" on the ETPUH module to the voltage corresponding to the desired total minimum airflow. b. Set the adjustment labeled "MAX" on the ETPUH module to the desired maximum hot deck airflow. c. Connect the red (+) lead from the DC voltmeter to either end of JP6 on the ETPUH module (see Fig. 9). Leave the black (-) lead attached to the "COM" test loop on the hot deck master control-
Johnson Controls
FORM ET130.13-NOM5 (209)
ler. Use the following equation to calculate the value of voltage to be set for the desired mixing band: V = 8.3 - (0.25 x desired mixing band) + (minimum total airflow setpoint/maximum cooling airflow setpoint) The mixing band is in degrees Fahrenheit and the airflow setpoints are in CFM. Set the calculated voltage using R11 on the ETPUH module (see Fig. 9). Thermostat Input
Maximum Hot Deck Airflow Adjustment
Total Minimum Airflow Adjustment
JP6
Master Controller Mating Socket
Mounting Bracket
3.5.3 - DD7300
a. Connect the red (+) lead from the DC voltmeter to the "VSP" test loop and the black (-) lead to the "COM" test loop on the hot deck master controller. If installed, disconnect the wire from the optional CO2 sensor from terminal 4 of the hot deck ETPCV2 module. Turn the adjustment labeled "AUX" on the ETPCV2 module to the voltage corresponding to the desired outside airflow. If the CO2 sensor option is to be used, temporarily short terminal 4 to terminal 7 on the ETPCV2 module and turn the adjustment labeled "MIN" to the voltage corresponding to the desired low level outside air flow. b. Turn the temperature setpoint knob to full cooling. Connect the red (+) lead from the DC voltmeter to the "VSP" test loop and the black (-) lead to the "COM" test loop on the cold deck master controller. Turn the adjustment labeled "MAX" on the cold deck ETPUC module fully counter clockwise. Set the adjustment labeled "MIN" on the cold deck ETPUC module to the desired minimum cold deck airflow. c. Set the adjustment labeled "MAX" on the cold deck ETPUC module to the desired maximum cold deck airflow.
R11 LD13962
FIG. 9 - ETPUH MODULE
d. Turn the temperature setpoint knob to full cooling. Connect the red (+) lead from the DC voltmeter to the "VSP" test loop and the black (-) lead to the "COM" test loop on the cold deck master controller. Turn the adjustment labeled "MAX" on the cold deck ETPUC module fully counter clockwise. Set the adjustment labeled "MIN" on the cold deck ETPUC module to the desired minimum cold deck airflow. e. Set the adjustment labeled "MAX" on the cold deck ETPUC module to the desired maximum cold deck airflow.
Johnson Controls
15
FORM ET130.13-NOM5 (209)
4.0 - TROUBLESHOOTING With all electrical devices there is the danger of electrical shock. Lethal voltages are present at the supply connections of all power transformers. Use caution when measuring operating voltages of these units. a. At the beginning of each section are “Common Problems.” To save time, check these items first. b. IMPORTANT: If a unit operates correctly when forced into normal mode, the problem is with the particular option being defeated. Many of the procedures refer to Normal and/or Option Mode. Normal Mode refers to daytime, cooling operation. A unit with options may be forced into Normal Mode by removing the duct sensor wire from controller Terminal 3, and/or removing a wire from the pressure switch. c. Many of the procedures in this section require taking voltage readings. This may be done easily by using meter leads with spring-loaded clips instead of the usual probes. These leads free your hands for other work; they may be purchased at consumer electronics stores. For controller terminals not having test loops, voltages may be read by holding the meter lead directly on the screw terminal or tab connector (as applicable). Test points followed by a “(+)” are to be attached to the “+” jack of your meter, which is usually the red lead. Test points followed by a “(-)” are to be attached to the “-” jack of your meter, which is usually the black lead.
d. Since most of the procedures are temperature related, you must ensure that the ambient temperature at the thermostat is 55-85°F. also, the primary air supply must be 55-85°F, at 0.5-2.5" W.G. inlet static pressure. e. Some sequences have balancing adjustments on the Flow Control module. If troubleshooting one of these sequences, substitute “terminal 3 of the thermostat” for “terminal 6 of the thermostat” in the troubleshooting instructions. Also substitute “master controller ‘VSP’ test loop” for “terminal 5 of the thermostat.” f. The following table is a list of unit functions. Follow the table in the order presented to determine the specific problem(s). For instance, to diagnose a single duct, cooling only terminal which does not move its damper when the thermostat is turned from full heating to full cooling (or vice versa), first go through section 4.1 (Damper Motion). Then, if the problem is not resolved, go to section 4.9 (No Response to Thermostat).
TABLE 4.0 - QUICK REFERENCE
16
PROBLEM WITH: :
PROCEED TO SECTION
DAMPER MOTION
4.1
FAN
4.2
ELECTRIC OR HOT WATER HEAT
4.3
NIGHT SETBACK
4.4
NIGHT MODE (SERIES FLOW TERMINAL ONLY)
4.5
MORNING WARM-UP
4.6
AUXILIARY (HEATING) MINIMUM
4.7
AIRFLOW READINGS
4.8
NO RESPONSE TO THERMOSTAT
4.9
CORRECTIVE ACTIONS
4.10
Johnson Controls
FORM ET130.13-NOM5 (209)
4.1 - DAMPER MOTION
The current 7000 Series Master Controller drives a Floating Point M9104 Series actuator. Since the output is time-proportioned, it will be necessary to observe the actuator for up to 30 seconds before proceeding with each step. Do not use the Series 7000 Master Controller with any other AC drive actuator, or serious damage to the controller may result.
These procedures apply only to Series 7000 used with the M9104 Series actuator. Refer to the Series 700 IOM for legacy applications. COMMON PROBLEMS
1. Output wires backwards; Terminal 13 is CCW (open), Terminal 14 is CW (closed). 2. Option Mode enabled; that the unit is in Normal Mode before continuing with this procedure. See Section 4.0.b.
TABLE 4.1 Step
Action
Result
Proceed To
4.1.1
actuator is operating properly using checkout instructions on page 5 of Installation Instructions (Part No. 34-636-1433) available at www.enviro-tec.com.
4.1.2
As previously described, force unit to normal mode. Attempt to set MIN (and AUX MIN, if equipped) AIRFLOW to 15.2 VDC per Section 3.0, “Balancing”
Good Bad
4.1.3 4.9
4.1.3
Set MAX AIRFLOW to 5.0 VDC
Good Bad
4.1.4 4.10.18
4.1.4
Connect DC voltmeter between VSP (+) and Com (-) test loops on controller. Vary the thermostat setpoint and that voltage goes from 15.2 VDC to 5.0 VDC.
Good Bad
4.1.5 4.10.1
4.1.5
Turn the thermostat setpoint to full heating and that the damper shaft rotates in the CW (closed) direction at least once every 30 seconds. Then turn the temperature setpoint to full cooling and that the damper shaft rotates in the CCW (open) direction at least once every 30 seconds.
Good Bad
4.1.6 4.8
4.1.6
Damper actuator and controller actuator drive are working correctly. If you have other problems, refer to Table 4.0
Johnson Controls
17
FORM ET130.13-NOM5 (209)
4.2 - FAN
On parallel fan terminals (VFR), the fan relay is controlled by the electronic controller based on ambient temperature. On Series Flow fan terminals (CFR), the fan relay is kept ON in Normal Mode. In the Option Mode, the fan is either a: CYCLED to maintain temperature, or b: kept OFF, depending on your sequence.
COMMON PROBLEMS
1. Blown fan motor fuse. 2. Option Mode enabled; that the unit is in Normal Mode before continuing with this procedure. See Section 4.0.b. 3. Maximum airflow setpoint set below 3.0 VDC (Series Flow models only). 4. Blue and yellow wires swapped between transformer and controller.
TABLE 4.2 Step
4.2.1
Action
Result
Proceed to
As previously described in 4.0.6, force unit to normal mode. If the unit in question is a parallel fan terminal:
4.2.2
If the unit in question is a series flow fan terminal:
4.2.6
4.2.2
Connect DC voltmeter between terminal 6 (+) and terminal 2 (-) on thermostat. Vary the thermostat setpoint and that voltage goes from approximately 1VDC (CCW) to 17 VDC (CW).
Good Bad
4.2.3 4.9
4.2.3
Connect DC voltmeter between terminal 5 (+) on the Heat/Fan Module and Com test loop (-) on master controller. Vary the thermostat setpoint and that voltage goes from approximately 1VDC (CCW) to 17 VDC (CW).
Good Bad
4.2.4 4.10.1
4.2.4
Within the control or electric heat enclosure, locate the fan relay (or magnetic or if installed).
Good Bad
4.2.5
Turn the thermostat setpoint to full cooling, then slowly turn it toward full heating. that the fan relay (magnetic or) engages at 1 to 2 degrees above ambient temperature.
Good Bad
4.2.8 4.2.6
4.2.6
Carefully check wiring to the fan relay (magnetic or) per the sequence.
Good Bad
4.2.7 4.10.1
4.2.7
Remove the wire from Heat/Fan Module Terminal 9 and momentarily touch it to master controller Terminal 15. that the fan relay (or magnetic or) engages.
Good Bad
4.10.14 4.10.4
4.2.8
Fan controls are operating correctly in Normal Mode. If you wish to test the fan in an option mode, or if you have other problems, refer to Table 4.0.
18
Johnson Controls
FORM ET130.13-NOM5 (209)
4.3 - ELECTRIC OR HOT WATER HEAT COMMON PROBLEMS
1. 2. 3.
Blown fan motor fuse. Option Mode enabled; that the unit is in Normal Mode before continuing with this procedure. See Section 4.0.b. Blue and yellow wires swapped from transformer to controller.
TABLE 4.3 STEP
ACTION
RESULT
PROCEED TO
4.3.1
As previously described in 4.0.b, force unit to normal mode. Connect DC voltmeter between terminal 6 (+) and the common loop (-) on thermostat. Vary the thermostat setpoint and that voltage goes from approximately 1 VDC (full cooling) to 17 VDC (full heating).
Good Bad
4.3.2 4.9
4.3.2
Connect DC voltmeter between Heat/Fan module terminal 5 (+) and Com (-) test loop on master controller. Turn the thermostat setpoint CW and CCW, and that voltage goes from approximately 1 VDC (full cooling) to 17 VDC (full heating).
Good Bad
4.3.3 4.10.1
4.3.3
Determine the type of heat control and proceed to the step indicated: Staged Electric, or On/Off Hydronic Floating, Modulating Hydronic Proportional Modulating Hydronic SSR/ SCR Electric
4.3.4
If the unit is equipped with electric heat, locate the heat relays (ors) within the heater cabinet. If the unit is equipped with hot water heat, locate the hot water valve actuator. Turn the thermostat setpoint to full cooling, then slowly turn it toward full heating. that the first stage heat relay (magnetic or) or hot water valve actuator engages at 2-3 degrees above ambient temperature.
Good Bad
4.3.5 4.3.6
4.3.5
If you have only one stage of electric or hydronic heat, go to 4.3.26. Otherwise, continue slowly turning the temperature setpoint toward full heating, and that stages 2 and 3 (if applicable) engage in approximately 1 degree increments.
Good Bad
4.3.7 4.3.6
4.3.6
Carefully check wiring to the heat relays (ors) or hot water valve actuator per the application. If correct, remove the wire from the faulty Heat/Fan module Terminal Output (10 through 12), and momentarily touch it to master controller terminal 15. that the heat relay (or) or hot water valve actuator engages.
Good Bad
4.10.14 4.10.5
4.3.7
Heat controls are operating correctly in Normal Mode. If you wish to test the heat in an option mode, or if you have other problems, refer to Table 4.0. END OF STAGED ELECTRIC OR ON/OFF HYDRONIC SECTION
4.3.8
Turn the thermostat temperature setpoint to full cooling and that the valve is closing (if already closed, proceed to Step 4.3.10).
Good Bad
4.3.10 4.3.9
4.3.9
Carefully check the wiring of the valve actuator per the application submittal data and the valve actuator manufacturers’ literature. If correct, remove the wire from terminal 11 of the Heat/Fan module and touch to terminal 15. that the valve is closing.
Good Bad
4.10.14 4.3.12
4.3.10
Turn the thermostat temperature setpoint to full heating and that the valve is opening.
Good Bad
4.3.13 4.3.11
4.3.11
Carefully check the wiring of the valve actuator per the application submittal data and the valve actuator manufacturers’ literature. If correct, remove the wire from terminal 10 of the Heat/Fan module and touch to terminal 15. that the valve is opening.
Good Bad
4.10.14 4.3.12
4.3.12
The controller valve outputs are operational. The valve actuator may be damaged or defective. Refer to the literature provided by the manufacturer of the valve actuator to diagnosis the problem.
4.3.4 4.3.8 4.3.14 4.3.21
Continued on next page Johnson Controls
19
FORM ET130.13-NOM5 (209)
TABLE 4.3 (cONT.)
RESULT
PROCEED TO
4.3.15
Disconnect the wire from terminal 12 of the Heat/Fan Module. Turn the thermostat temperature setpoint to full cooling and measure the voltage on Heat/Fan Module terminals 12 (+) and 7(-). the closed voltage (10 VDC or higher)
Good Bad
4.3.16 4.10.14
4.3.16
Turn the thermostat temperature setpoint to full heating and measure the voltage on Heat/Fan Module terminals 12 (+) and 7 (-). the open voltage (2 VDC or lower).
Good Bad
4.3.17 4.10.14
4.3.17
Reconnect the wire to terminal 12 of the Heat/Fan Module. Carefully check the wiring of the valve actuator per the application submittal data and the manufacturer’s literature.
Good Bad
4.3.18 4.10.1
4.3.18
that the valve is opening. Turn the thermostat temperature setpoint to full cooling. that the valve is closing.
Good Bad
4.320 4.3.19
4.3.19
The valve actuator may be damaged or defective. Refer to the literature provided by the manufacturer of the valve actuator or SSR/SCR to diagnose the problem.
4.3.20
The controls and valve actuator appear to be functioning properly. If temperature is not being controlled properly, the problem may be in thermostat calibration. See Section 5.1. END OF PROPORTIONAL MODULATING HYDRONIC SECTION
4.3.21
The standard heat/fan module’s signal for SCR or SSR electric heat is 2 VDC (off) to 10 VDC (fully on). If a current (1995 and up) SSR heat interface is provided by ENVIROTEC, it should be a model ETPHCV2. Early model (prior to 1996) SCR heat controllers provided by ENVIRO-TEC should have an ETPCM4V2 or ETPCM8V2 master SCR controller. If the SCR or SSR heat control is made by others, refer to the manufacturer’s literature to it will accept a 2 to 10 VDC signal.
4.3.22
Disconnect the wire from terminal 12 of the Heat/Fan Module. Turn the thermostat temperature setpoint to full cooling and measure the voltage on Heat/Fan Module terminals 12 (+) and 7 (-). the off voltage is less than 2 VDC.
Good Bad
4.3.23 4.10.14
4.3.23
Turn the thermostat temperature setpoint to full heating and measure the voltage on Heat/Fan Module terminals 12 (+) and 7 (-). the full on voltage is equal to or greater than 10 VDC.
Good Bad
4.3.24 4.10.14
4.3.24
Reconnect the wire to terminal 12 of the Heat/Fan Module. Carefully check the wiring of the SSR/SCR per the application submittal data and the heater wiring diagram (if manufactured by ENVIRO-TEC) or SSR/SCR manufacturer’s literature.
Good Bad
4.3.25 4.10.1
4.3.25
that the SSR/SCR heat is full on. Turn the thermostat temperature setpoint to full cooling. that the SSR/SCR heat is off.
Good Bad
4.3.27 4.3.26
4.3.26
The valve actuator or SSR/SCR may be damaged or defective. Refer to the literature provided by the manufacturer of the valve actuator or SSR/SCR to diagnose the problem.
4.3.27
The controls and valve actuator or SSR/SCR appear to be functioning properly. If temperature is not being controlled properly, the problem may be in thermostat calibration. See Section 5.1. END OF SSR/SCR ELECTRIC SECTION
STEP
ACTION
4.3.13
If the procedure in step 4.3.8 was not performed because the valve was already closed, proceed to that step. If that procedure has been performed, the controls and valve actuator appear to be functioning properly. If temperature is not being controlled properly, the problem may be in thermostat calibration. See Section 5.1. END OF FLOATING, MODULATING HYDRONIC SECTION
4.3.14
The standard heat/fan module’s proportional signal is 2 to 10 VDC normally open (NO); i.e. the valve should be fully open below 2 VDC and fully closed above 10 VDC. Special heat/fan modules may be reversed, and/or use a different signal range. Use the submittal diagram for the terminal unit in question to determine the output range. Make sure it is the same as the valve actuator’s range by referring to the valve actuator literature. Voltages for a standard heat/fan module will be used below, but the same steps may be used for other ranges by substituting the correct open and close voltages (or currents).
20
Johnson Controls
FORM ET130.13-NOM5 (209)
4.4 - NIGHT SETBACK COMMON PROBLEMS
1. Air hose on pressure switch connected to LOW fitting instead of HIGH. 2. Wires on pressure switch not connected to NC and COM. 3. Insufficient static pressure to keep pressure switch open. TABLE 4.4 STEP
ACTION
RESULT
PROCEED TO
4.4.1
Connect a DC voltmeter between Setback/Warmup module terminal 1 (+) and Com (-) loop on master controller. voltage is 14-18 VDC.
Good Bad
4.4.3 4.4.2
4.4.2
that the air pressure switch and controller wiring are all correct. Remove the wire from Setback/Warmup module Terminal 1 and voltage from Setback/Warmup module Terminal 1 (+) to Com (-) loop on master controller is 14-18 VDC.
Good Bad
4.4.3 4.10.15
4.4.3
Temporarily disconnect the hose going to the pressure switch at the "T" fitting. If disconnected, reconnect the wire to Terminal 1 and that the voltage from Controller Terminal 1 (+) to Com (-) loop on master controller is 0-1 VDC.
Good Bad
4.4.4 4.10.6
4.4.4
Blow in the hose going to the pressure switch and that the voltage from Controller Terminal 1 (+) to Com (-) loop on master controller jumps up to 14-18 VDC.
Good Bad
4.4.5 4.10.6
4.4.5
primary static pressure at terminal inlet is above 0.3" W.G.
Good Bad
4.4.6 4.10.7
4.4.6
Reconnect air hose. Vary the temperature setpoint and that it controls the damper, fan and heat (if applicable).
Good Bad
4.4.7 4.9.8
4.4.7
Disconnect air hose from pressure switch. Turn the Setback Offset adjustment located on the Setback/Warmup Module to the middle of its range. that the damper closes and the fan turns on/off approximately 7 to 8 degrees above ambient temperature. Return the Offset adjustment to its original position.
Good Bad
4.4.8 4.10.15
4.4.8
Reconnect air hose to pressure switch. Night Setback is operating correctly. If you wish to test the controls in another option mode, or if you have other problems, refer to Table 4.0.
Johnson Controls
21
FORM ET130.13-NOM5 (209)
4.5 - NIGHT MODE, COMMON PROBLEMS
This mode only applies to CFR/CFRQ fan terminal units. On power up or application of primary air pressure, there is a 3 to 5 minute delay before fan and heat are enabled.
1. Air hose on pressure switch connected to LOW fitting instead of HIGH. 2. Wires on pressure switch not connected to NC and COM. 3. Insufficient static pressure to keep pressure switch open.
TABLE 4.5 STEP
ACTION
RESULT
PROCEED TO
4.5.1
If the application incorporates a duct sensor, temporarily disconnect it from terminal 3 of the Setback/Warmup module.
4.5.2
Connect a DC voltmeter between Heat/Fan module Terminal 4 (+) and the Com (-) loop of the master controller. voltage is 14-18 VDC.
Good Bad
4.5.4 4.5.3
4.5.3
that the air pressure switch and controller wiring are all correct. Remove the wire from Heat/Fan module Terminal 4 and voltage from Terminal 4 (+) to the Com (-) loop on the master controller is 14-18 VDC.
Good Bad
4.5.4 4.10.14
4.5.4
Temporarily disconnect the hose going to the pressure switch at the "T" fitting. Reconnect the wire to Terminal 4, and that the voltage from Heat/Fan module (+) to Com (-) loop on the master controller is 0-1 VDC.
Good Bad
4.5.5 4.10.6
4.5.5
Blow in the hose and that the voltage jumps up to 14-18 VDC.
Good Bad
4.5.6 4.10.6
4.5.6
primary static pressure at terminal inlet is above 0.3" W.G.
Good Bad
4.5.7 4.10.7
4.5.7
Remove air hose from pressure switch. Turn the thermostat setpoint to full cooling. fan (and heat, if applicable) are off.
Good Bad
4.5.8 4.10.14
4.5.8
Reconnect air hose. Turn thermostat temperature setpoint to full heating. fan (and heat, if applicable) energizes after a 3 to 5 minute delay.
Good Bad
4.5.9 4.10.14
4.5.9
Night Mode is operating correctly. If applicable, reconnect the duct sensor to Terminal 3 of the Setback/Warmup module. If you wish to test the controls in another option mode, or if you have other problems, refer to Table 4.0.
22
4.5.2
Johnson Controls
FORM ET130.13-NOM5 (209)
4.6 - MORNING WARM-UP / CHANGEOVER For the tests below, supply air duct temperature should be between 55° and 85° Fahrenheit. COMMON PROBLEMS
1. Duct Sensor Setpoint out of adjustment: this should be set midway between expected cold supply and hot supply air temperatures. Or, in lieu of this, set it to 70°F. 2. Supply air duct temp. sensor out of calibration. Refer to Section 5.2 for calibration procedure.
Some Setback/Warmup module models do not include Terminal 2. If a procedure below requires a measurement on that terminal, take the measurement on either end of the resistor located behind the screw terminal connector between terminals 3 and 7 (see Fig. 10).
TABLE 4.6 STEP
ACTION
RESULT
PROCEED TO
4.6.1
all wiring is correct between thermostat and controller per application submittal drawing. If correct, disconnect both duct sensor wires from the Setback/Warmup module and duct sensor resistance is between 11 K ohms and 27 K ohms (temperature dependent: high value cool, low value warm).
Good Bad
4.6.2 4.10.9
4.6.2
If present, disconnect wire from terminal 2 of Setback/Warmup module. Turn "Duct Temp" adjustment to 90°F. Connect DC voltmeter between terminals 2 (+) of the Setback/Warmup module and Com (-) of the master controller. voltage is 14 - 18 VDC.
Good Bad
4.6.3 4.10.15
4.6.3
Turn "Duct Temp" adjustment to 50°F. Connect DC voltmeter between terminals 2 (+) of the Setback/Warmup module and Com (-) loop of the master controller. voltage is 0 - 1 VDC.
Good Bad
4.6.4 4.10.15
4.6.4
If there is no terminal 2, go to 4.6.10. Otherwise, reconnect wire to terminal 2, and turn thermostat temperature setpoint to full heating. damper is opening (if not already at maximum CFM setpoint). Also heat (if present) is off, fan is on (series fan terminal) or fan is off (parallel fan terminal).
Good Bad
4.6.5 4.6.9
4.6.5
Turn thermostat temperature setpoint to full cooling. damper is closing. Also heat (if present) is off, fan is on (series fan terminal) or fan is off (parallel fan terminal).
Good Bad
4.6.6 4.6.9
4.6.6
Turn "Duct Temp" adjustment to 90°F. damper is opening. Also heat (if present) is off, fan is on (series fan terminal) or fan is off (parallel fan terminal).
Good Bad
4.6.7 4.6.9
4.6.7
Turn the thermostat temperature setpoint to full heating. damper is closing, fan and heat (if applicable) are on.
Good Bad
4.6.8 4.6.9
4.6.8
Morning Warmup/Changeover is operating correctly. If you wish to test the controls in another option mode, or if you have other problems, refer to Table 4.0.
4.6.9
Remove wires from thermostat terminals 5 and 6. Go to step 4.9.11. If problem is not found after completing that section, use Table 4.0 to determine how to proceed to correct troubleshooting section.
4.6.10
Turn thermostat temperature setpoint to full heating. damper is opening (if not already at maximum CFM setpoint). Also heat (if present) is off, fan is on (series fan terminal) or fan is off (parallel fan terminal). Turn thermostat temperature setpoint to full cooling. damper is opening (if not already at maximum CFM setpoint). Also heat (if present) is off, fan is on (series fan terminal) or fan is off (parallel fan terminal).
Good Bad
4.6.6 4.6.9
Johnson Controls
23
FORM ET130.13-NOM5 (209)
4.7 - AUXILIARY MINIMUM On units having Morning Warmup, that warmup is not enabled before starting this procedure.
TABLE 4.7 STEP
COMMON PROBLEMS
1. Improper wiring. 2. Improper balancing: read Section 3.0 carefully to properly balance a unit having Aux Min (also known as a Dual Minimum or Heating Minimum). 3. Operator error: read the control sequence carefully to fully understand how Aux Min operates.
ACTION
RESULT
PROCEED TO
4.7.1
Turn thermostat temperature setpoint to full cooling. Turn MIN and AUX potentiometers fully CCW. Turn MAX potentiometers fully CW. Turn thermostat setpoint to full cooling. damper is opening.
Good Bad
4.7.2 4.9
4.7.2
Measure voltage between Thermostat Terminals 4 (+) and common loop (-). voltage is 0-1 VDC.
Good Bad
4.7.5 4.7.3
4.7.3
Carefully check wiring per control sequence.
Good Bad
4.7.4 4.10.1
4.7.4
Replace thermostat with a known good thermostat. Set potentiometers as in step 4.7.1 Measure voltage between Terminals 4 (+) and common loop (-). voltage is 0-1 VDC.
Good Bad
4.10.8 4.10.14
4.7.5
Turn thermostat setpoint to full heating. Measure voltage between Thermostat Terminals 4 (+) and common loop (-). voltage is 14-18 VDC.
Good Bad
4.7.8 4.7.6
4.7.6
Carefully check wiring per control sequence.
Good Bad
4.7.7 4.10.1
4.7.7
Replace thermostat with a known good thermostat. Set potentiometers as in step 4.7.1 and turn the setpoint to full heating. Measure voltage between Terminals 4 (+) and common loop (-). voltage is 14-18 VDC.
Good Bad
4.10.8 4.10.14
4.7.8
Measure voltage between master controller test loops "VSP" and COM (-). voltage is 14-18 VDC.
Good Bad
4.7.9 4.9
4.7.9
Slowly turn the AUX potentiometer on the thermostat CW and that the voltage drops.
Good Bad
4.7.11 4.7.10
4.7.10
Carefully check wiring per control sequence.
Good Bad
4.10.8 4.10.1
4.7.11
Check to ensure that the Heat relay(s) are ON or valve actuators are opening.
Good Bad
4.7.12 4.3
4.7.12
Auxiliary minimum is operating correctly, but thermostat may not be. Go to Step 4.9.11 to test thermostat. If you wish to test the controls in another option mode, or if you have other problems, refer to Table 4.0.
Good Bad
24
Johnson Controls
FORM ET130.13-NOM5 (209)
4.8 - AIRFLOW READINGS COMMON PROBLEMS
1. Loose tubing at velocity probe (at VAV terminal inlet). 2. Loose tubing at coupling (transition from black to clear tubing). 3. Loose tubing at controller. 4. Flex duct on inlet is bent too tightly. There should be a minimum of 1-1/2 diameters of straight duct at the inlet, e.g., an 8" box would need 12" of straight duct.
5. HIGH and LOW tubing connections reversed at controller. 6. Option Mode enabled; that the unit is in Normal Mode before continuing with this procedure. See Section 4.0.b.
TABLE 4.8 STEP
ACTION
RESULT
PROCEED TO
4.8.1
Disconnect both airflow hoses at the duct inlet. Connect voltmeter to “Vf” (+) and Com (-) on the master controller. 14.5-15.5 VDC.
Good Bad
4.8.2 4.10.3
4.8.2
Blow gently through the airflow hose connected to HIGH on the controller. voltage drops to 0-3 VDC.
Good Bad
4.8.3 4.10.3
4.8.3
The flow circuit seems to be operating correctly. Carefully check the items under “Common Problems” above.
Good Bad
4.10.3 4.8.4
4.8.4
Fix tubing and/or flex duct, and “unless instructed otherwise in another section” go to Step 4.9.1.
Johnson Controls
25
FORM ET130.13-NOM5 (209)
4.9 - NO RESPONSE FROM THERMOSTAT This section assumes that procedures for specific symptoms (e.g., no damper motion, or fan/heat do not turn on, or do not turn off) have already been followed. If not, follow those procedures before attempting this section. TABLE 4.9 STEP
COMMON PROBLEMS
1. Incorrect wiring; check control sequence carefully. 2. Insufficient static air pressure 3. Option Mode enabled; that the unit is in Normal Mode before continuing with this procedure (see Section 4.0b)
ACTION
RESULT
PROCEED TO
4.9.1
Measure voltage between master controller Terminal 8 (+) and COM test loop (-). voltage is 17.4-18.6 VDC.
Good Bad
4.9.11 4.9.2
4.9.2
Measure AC voltage between Terminals 15 (either quick connect) and 16 (either quick connect) at the master controller. 22.0-27.6 VAC.
Good Bad
4.9.3 4.10.11
4.9.3
Turn power off to the controller, remove the fuse and that fuse resistance is 0-1 ohm.
Good Bad
4.9.4 4.10.12
4.9.4
Remove all wiring except the transformer wires on terminals 15 and 16. Remove all modules from the Master Controller using the procedure in Section 2.8. Replace the fuse. Reapply power. Measure voltage between Master Controller terminal 8 (+) and COM test loop (-). voltage is 17.4-18.6 VDC.
Good Bad
4.9.5 4.10.3
4.9.5
Replace modules one at a time per instructions in Section 2.8. Check voltage between Master Controller terminal 8 (+) and COM test loop (-) checking for 17.4-18.6 VDC after each is replaced.
Good Bad
4.9.6 4.10.17
4.9.6
Reconnect all thermostat wires. Measure voltage between Master Controller terminal 8 (+) and COM test loop (-). voltage is 17.4-18.6 VDC.
Good Bad
4.9.8 4.9.7
4.9.7
Check wiring carefully per application Submittal Data.
Good Bad
4.10.18 4.10.1
4.9.8
Reconnect all remaining wiring that was removed in step 4.9.4. Measure voltage between Master Controller terminal 8 (+) and Com test loop (-). voltage is 17.4 - 18.6 VDC.
Good Bad
4.9.9 4.10.1
4.9.9
Measure voltage between Thermostat Terminals 1 (+) and 2 (-). voltage is 17.4-18.6 VDC.
Good Bad
4.9.10 4.10.1
4.9.10
Recheck thermostat response.
Good Bad
4.9.16 4.9.11
4.9.11
that the unit is in the normal mode by referring to the appropriate step, e.g., Night Setback, Morning Warmup, etc., and ensuring that the Option Mode is not enabled. Go to step 4.9.12.
4.9.12
Remove the wire from thermostat terminals 5 and 6 (if present). Go to step 4.9.13.
4.9.13
Turn the temperature setpoint to full heat and measure the voltage from the balance post (+) of the thermostat (see Fig. 1) and the common loop (-). This voltage is the minimum flow voltage, and the correct value depends on the design minimum CFM. It should be a reasonable value for minimum flow (on the order of 9-16 volts). Turn the temperature to full cooling. The voltage should drop to a value between 3-10 volts. This is the maximum flow voltage, and depends on the design maximum CFM.
Good Bad
4.9.15 4.9.14
4.9.14
Attempt to rebalance the terminal using the instructions in Section 3.2.
Good Bad
4.9.15 4.10.18
4.9.15
Reconnect wires to terminals 5 and 6 of thermostat. Go to 4.8.1. If good, return to 4.9.13.
4.9.16
The thermostat appears to be operating correctly with regard to the damper control signal, and the fan/heat control signal. If you are having problems with an Option Mode, refer to Table 4.0.
26
Johnson Controls
FORM ET130.13-NOM5 (209)
4.10 - CORRECTIVE ACTIONS TABLE 4.10 STEP
PROBABLE CAUSE / REMEDY
4.10.1
Wiring is bad. Your electronic components can withstand several types of wiring errors, but not all. Check sequence closely; if in doubt as to any part of the diagram, call your representative for assistance BEFORE applying power. A quick phone call will save you time and prevent equipment damage.
4.10.2
Damper shaft is not indexed correctly. Loosen the damper clamp. Touch the wire from terminal 2 of the actuator to terminal 15 of the controller and wait for the actuator to drive to its fully open (CCW) position. Open the damper by manually rotating the shaft fully CCW and retightening the clamp. Return to Step 4.1.10
4.10.3
Master controller is potentially damaged or defective. If available, replace with a known working master controller to diagnosis.
4.10.4
Fan relay is damaged or defective. Replace it.
4.10.5
Heat relay is damaged or defective. Replace it.
4.10.6
Air pressure switch is damaged or defective. Replace it.
4.10.7
Insufficient primary static air pressure. Check static pressure controller on main air handler and/or balancing dampers upstream, etc.
4.10.8
Original thermostat is damaged or defective.
4.10.9
Duct sensor is damaged or defective. Replace it. Recalibrate new duct sensor per section 5.2
4.10.10
Controller is potentially out of calibration. Checking this requires a calibrated air source. Make a note of the airflow readings and call your representative for Return Authorization.
4.10.11
Transformer and/or incoming line voltage, e.g., 120 VAC, 277 VAC, is bad. Check line voltage. If okay, replace transformer.
4.10.12
Fuse is blown. Replace with a standard 1 amp, 3AG fuse. Go to 4.9.4.
4.10.13
Actuator is damaged or defective. Replace it.
4.10.14
Heat/Fan Module is potentially damaged or defective. Replace with a known working Heat/Fan Module, if available, to diagnosis.
4.10.15
Setback/Warmup Module is potentially damaged or defective. Replace with a known working Setback/Warmup Module, if available, to diagnosis.
4.10.16
Flow Control Module is potentially damaged or defective. Replace with a known working Flow Control Module, if available, to diagnosis.
4.10.17
Module is potentially damaged or defective. Replace with a known working module, if available, to diagnosis. Check fuse and replace if necessary.
4.10.18
Thermostat is potentially damaged or defective. Replace with a known working thermostat, if available, to diagnosis. NOTE: If balance adjustments are located on Flow Control module, go to 4.10.16.
Before replacing the thermostat, note the position of the calibration potentiometers on the old thermostat. Set the potentiometers on the new thermostat to the same position as the old thermostat to get “in the ballpark.” However, do not adjust the uppermost white “Temperature Calibration” potentiometer on the new stat as it has been factory calibrated under controlled conditions.
Johnson Controls
27
FORM ET130.13-NOM5 (209)
5.0 - TEMPERATURE CALIBRATION
C3
LD13971
2
28
TERMINAL 2 MEASUREMENT POINT
+
1
2. that the controls are in the NORMAL (day or cooling) MODE. Determine the maximum and minimum (cooling minimum if dual minimum application) air flow voltages. 3. Use a calibrated temperature meter or thermometer to determine the space temperature, and set the temperature setpoint to that temperature. Connect DC voltmeter between the balance post (+) of the thermostat (see Fig. 1) and the common loop (-). 4. Adjust the uppermost white potentiometer (labeled “Temperature Calibration” in Fig. 1) until the voltmeter reads the maximum air flow voltage (lowest value in volts). 5. While watching the voltmeter, SLOWLY adjust the uppermost white potentiometer until the voltage reaches minimum flow voltage (highest value in volts). The point at which the voltage just reaches minimum flow voltage when adjusting from maximum is the calibration point. 6. Remove voltmeter leads and replace cover.
5S
The temperature measuring device (thermistor) located in the lower left corner of the thermostat (see Fig. 1) is very sensitive to temperature with the cover removed. Body heat can influence it greatly; therefore, attempt to keep hands away from the device while performing the procedures below.
7
5.1 - THERMOSTAT All thermostats are factory calibrated in a controlled environment; however, they may occasionally become uncalibrated during shipment or installation. Also, the thermostat may not be able to be located in such a way as to accurately reflect the temperature of the majority of the space. The procedure below allows these conditions to be corrected in the field. 1. Ensure the space temperature is between 60°F and 80°F. Remove the thermostat cover as described in Section 3.2.
5.2 - D UCT (SUPPLY AIR) TEMPERATURE SENSOR A Series 7000 duct temperature sensor must be calibrated to the Setback/Warmup Module with which it is used. This is done at the factory for new projects, but if either the sensor or the module must be replaced in the field, field calibration is required. The supply air temperature must be between 55°F and 85°F for this procedure to be effective. a. Connect duct sensor to terminals 3 and 7 of the Setback/Warmup Module. Connect the negative lead of a DC voltmeter to the COM loop of the Master Controller. Connect the positive lead to terminal 2 of the Setback/Warmup Module (if present). If terminal 2 is not present, connect to either end of the resistor located behind the screw terminal connector, between terminals 3 and 7 (see Fig. 10). 3
Temperature calibration is only required under special circumstances. It is not normally required during initial installation, commissioning and/or balancing.
FIG. 10 - WARMUP MEASUREMENT POINT
b. Measure the supply air temperature with a calibrated temperature meter. Set the blue Duct Temp adjustment to that temperature. c. Adjust R3 (white potentiometer next to blue Duct Temp adjustment) until the voltage switches between less than one volt to over 14 volts (or vice versa). Back the adjustment off (turn in direction opposite original direction of rotation) slightly. d. Readjust the Duct Temp adjustment to halfway between the expected cold air temperature and hot air temperature (see Section 3.3.2.b). Johnson Controls
FORM ET130.13-NOM5 (209)
6.0 - part numbers & sequence number cross reference 6.1 - THERMOSTAT PART NUMBERS Replacement thermostats are shipped without cover or mounting hardware. If original cover and/or hardware is lost or damaged, these items must be ordered separately. PART NUMBER
DESCRIPTION
ETST5AW
Thermostat circuit board, base and connector
ETST4H
Thermostat circuit board, base and connector
ETSTKITC
Concealed setpoint cover and mounting hardware
ETSTKITPF
Exposed setpoint cover, Fahrenheit scale knob and mounting hardware
ETSTKITPC
Exposed setpoint cover, Celsius scale knob and mounting hardware
6.2 - 700 TO 7000 SEQUENCE NUMBER CROSS REFERENCE The following table should be used to determine the correct control sequence to use when replacing 700 Series controls with Series 7000 controls. SINGLE DUCT
DUAL DUCT
7000 SEQUENCE
OLD 700 SEQUENCE
7000 SEQUENCE
SD7000
SD701S
DD7100
SD702S
DD7200
OLD 700 SEQUENCE DD701S DT701S
SERIES FLOW 7000 SEQUENCE FC7001
OLD 700 SEQUENCE FC701S FC702S
PARALLEL FLOW 7000 SEQUENCE FV7001
OLD 700 SEQUENCE FV701S FV702S
DD702A
SD703S SD704S SD713S SD7001
SD714S
FC7003
FC7020SM
FV7003
FV702SM
FC7004
N/A
FV7004
N/A
N/A
FV7005
N/A
FC704S
FV7002
SD715S SD724S SD725S SD726S SD702SM SD7003
SD713SM SD724SM
SD7004
N/A
FC7005
SD7005
N/A
FC7002
FC713S SD7100
SD705S
FC7101
FC714S
FV704S FV717S
FV7101
FC715S
FV718S FV719S
SD706S SD707S SD7101
SD708S SD716S
FC7103
FC714SM
FV7103
FV718SM
FC7104
N/A
FV7104
N/A
SD717S SD718S SD7103
SD706SM SD716SM
Continued on next page Johnson Controls
29
FORM ET130.13-NOM5 (209)
6.2 - 700 TO 7000 SEQUENCE NUMBER CROSS REFERENCE (Cont.) SINGLE DUCT 7000 SEQUENCE
OLD 700 SEQUENCE
DUAL DUCT 7000 SEQUENCE
OLD 700 SEQUENCE
SERIES FLOW 7000 SEQUENCE
PARALLEL FLOW
OLD 700 SEQUENCE
7000 SEQUENCE
OLD 700 SEQUENCE
SD7104
N/A
FC7105
N/A
FV7105
N/A
SD7105
N/A
FC7102
FC716S
FV7102
FV720S
FC705S SD7300
N/A
FC7201
FC706S
FV705S FV7201
FC707S SD7301
N/A
FC7203
FC706SM
FV706S FV707S
FV7203
FV706SM
SD7303
N/A
FC7204
N/A
FV7204
N/A
SD7304
N/A
FC7205
N/A
FV7205
N/A
SD7305
N/A
FC7202
FC708S
FV7202
FV708S
SD7600
SD723R
FC7301
N/A
FV7301
N/A
SD7606
SD727R
FC7303
N/A
FV7303
N/A
SD7607
SD728R
FC7304
N/A
FV7304
N/A
FC7305
N/A
FV7305
N/A
FC7302
N/A
FV7302
N/A
FC7501
N/A
FV7501
N/A
FC7503
N/A
FV7503
N/A
FC7504
N/A
FV7504
N/A
FC7505
N/A
FV7505
N/A
FC7502
N/A
FV7502
N/A
FC717S FC7401
FC718S
FV721S FV7401
FC719S
30
FV722S FV723S
FC7403
FC718SM
FV7403
FV722SM
FC7404
N/A
FV7404
N/A
FC7405
N/A
FV7405
N/A
FC7402
FC720S
FV7402
FV724S
Johnson Controls
FORM ET130.13-NOM5 (209)
6.3 - 700 TO 7000 CONTROLLER MODEL NUMBER CROSS REFERENCE All replacement controls require an ETPM7 master controller and a mounting bracket (29-00-236). Modules required to provide the same functionality as the 700 Series controller are listed below. Although ETPR series controllers are shown, the list may be used with ETPD and ETPI series controllers. Substitute a "D" for the "R" in the 700 model number to convert the ETPD series; substitute an "I" for the "R" in the 700 model number to convert to ETPI series. An ACT24 actuator must be installed when replacing a 700 model controller with a Series 7000 controller. 700 CONTROLLER
7000 MODULES
700 CINTROLLER 7000 MODULES
ETPR0
N/A
ETPR0FTBWD
ETPH3
ETPWSB
ETPR1
ETPH3
ETPR1FTBWD
ETPH3
ETPWSB
ETPR1MP
ETPHM1
ETPR1FTBWDMP
ETPFVHM1
ETPWSB
ETPR2
ETPH3
ETPR2FTBWD
ETPH3
ETPWSB
ETPR3
ETPH3
ETPR3FTBWD
ETPH4
ETPWSB
ETPR0CD
ETPCO
ETPR1CD
ETPH3
ETPCO
ETPR0FTSWD
ETPH3
ETPWS
ETPR1FTSWD
ETPH3
ETPWS
ETPR1CDMP
ETPHM1
ETPCO
ETPR1FTSWDMP
ETPFVHM1
ETPWS
ETPR2CD
ETPH3
ETPCO
ETPR2FTSWD
ETPH3
ETPWS
ETPCO
ETPR3FTSWD
ETPH4
ETPWS
ETPR3CD
ETPH3
ETPR1A
ETPH3
ETPR1MP
ETPHM1
ETPR0FY
ETPFH2
ETPR2A
ETPH3
ETPR1FY
ETPFH2
ETPR3A
ETPH3
ETPR1AWD
ETPH3
ETPCO
ETPR1FYMP
ETPFHM1
ETPR2FY
ETPFH2
ETPR1CDMP
ETPHM1
ETPCO
ETPR3FY
ETPFH3
ETPR2AWD
ETPH3
ETPCO
ETPR0FB
ETPFH2
ETPSB
ETPR3AWD
ETPH3
ETPCO
ETPR1FB
ETPFH2
ETPSB
ETPR1FBMP
ETPFHM1
ETPSB
ETPD0U
ETPUC
ETPR2FB
ETPFH2
ETPSB
ETPD0HU
ETPUH
ETPR3FB
ETPFH3
ETPSB
ETPR0FS
ETPFH2
ETPS
ETPR0FT
ETPH3
ETPR1FS
ETPFH2
ETPS
ETPR1FT
ETPH3
ETPR1FSMP
ETPFHM1
ETPS
ETPR1FTMP
ETPFVHM1
ETPR2FS
ETPFH2
ETPS
ETPR2FT
ETPH3
ETPR3FS
ETPFH3
ETPS
ETPR3FT
ETPH4
ETPR0FYWD
ETPFH2
ETPCO
ETPR0FTB
ETPH3
ETPSB
ETPR1FYWD
ETPFH2
ETPCO
ETPR1FTB
ETPH3
ETPSB
ETPR1FYWDMP
ETPFHM1
ETPCO
ETPR2FYWD
ETPFH2
ETPCO
ETPR1FTBMP
ETPFVHM1
ETPSB
ETPR2FTB
ETPH3
ETPSB
ETPR3FTB
ETPH4
ETPSB
ETPR3FYWD
ETPFH3
ETPCO
ETPR0FTS
ETPH3
ETPS
ETPR0FBWD
ETPFH2
ETPWSB
ETPR1FTS
ETPH3
ETPS
ETPR1FBWD
ETPFH2
ETPWSB
ETPR1FTSMP
ETPFVHM1
ETPS
ETPR1FBWDMP
ETPFHM1
ETPWSB
ETPR2FTS
ETPH3
ETPS
ETPR2FBWD
ETPFH2
ETPWSB
ETPR3FBWD
ETPFH3
ETPWSB
ETPR3FTS
ETPH4
ETPS
ETPR0FSWD
ETPFH2
ETPWS
ETPR0FTWD
ETPH3
ETPCO
ETPR1FSWD
ETPFH2
ETPWS
ETPR1FTWD
ETPH3
ETPCO
ETPR1FSWDMP
ETPFHM1
ETPWS
ETPR1FTWDMP
ETPFVHM1
ETPCO
ETPR2FSWD
ETPFH2
ETPWS
ETPR3FSWD
ETPFH3
ETPWS
ETPR2FTWD
ETPH3
ETPCO
ETPR3FTWD
ETPH4
ETPCO
Johnson Controls
31
FORM ET130.13-NOM5 (209)
7.0 - AIRFLOW CALIBRATION CURVES
LD13958
• For air terminals with a desired minimum setpoint of 0 CFM, set minimum voltage at 17 VDC. • Sizes 6 through 22 utilize FlowStarTM multi-axis center averaging sensor. • Sizes 4 and 5 utilize single axis, linear averaging multi-point sensor.
Fig. 11 - SDR, DDR, VFR, CFR, CFRQ Volts vs. CFM 32
Johnson Controls
AIRFLOW (CFM)
PRIMARY AIR INLET SIZE
FORM ET130.13-NOM5 (209)
LD13959
FIG. 12 - SDR, DDR, VFR, CFR, CFRQ ΔP (Inches W.G.) vs. CFM
For Voltage Calibration - Refer to Fig. 11
Johnson Controls
33
PRIMARY AIR INLET SIZE
AIRFLOW (CFM)
FORM ET130.13-NOM5 (209)
LD13960
fig. 13 - SSD, SDD, VVF, CVF, CVFQ Volts vs. CFM and ΔP (Inches W.G.) 34
Johnson Controls
FORM ET130.13-NOM5 (209)
NOTES
Johnson Controls
35
©2009 Johnson Controls, Inc.
P.O. Box 423, Milwaukee, WI 53203 www.johnsoncontrols.com
Printed in USA ET130.13-NOM5 (209) New Release
Related Documents 171j1w

Eti Electronic Vav 2b5kt
November 2019 58
Eti 5u5l5v
May 2022 0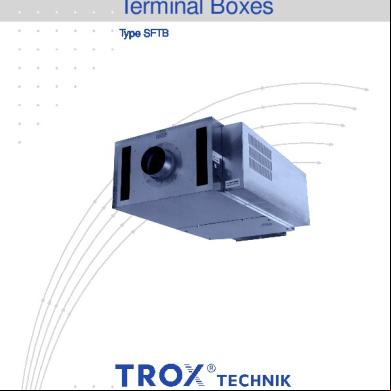
Trox Vav 1o3r5g
December 2019 52
Titus Vav 6e1k36
December 2019 37
Eti Caaa 5pi6t
April 2020 19
Espada Eti 664v4p
October 2019 92More Documents from "eddie" 1t2j2a
Eti Electronic Vav 2b5kt
November 2019 58
Feliz Ano Novo Rubem Fonseca Pdf 3x1q4w
October 2019 213
2c82t
September 2020 0
Catalogue_2013_2014 Laboutiqueofficiellepompiers.fr i6k67
July 2021 0
Xenderlogfile.txt 5g452m
December 2019 33